The KE70 comes in two main models: pre-facelift and facelift. The main difference that matters here is that the pre-facelift version requires a slight modification on one of the bolt holes on the top mount. Specifically, you’ll need to shave one bolt hole slightly to make it fit. I recommend only enlarging one hole; although it’ll be a bit bigger, as long as you don’t widen it, it should hold the top mount firmly with the bolt. That’s how I did it, and it worked great.
For facelift models, however, the top mount bolt pattern matches the AE86 perfectly, so no modifications are needed. ( If you happen to know anything about the panelvan/wagon version please hit me up so i can add that information!)
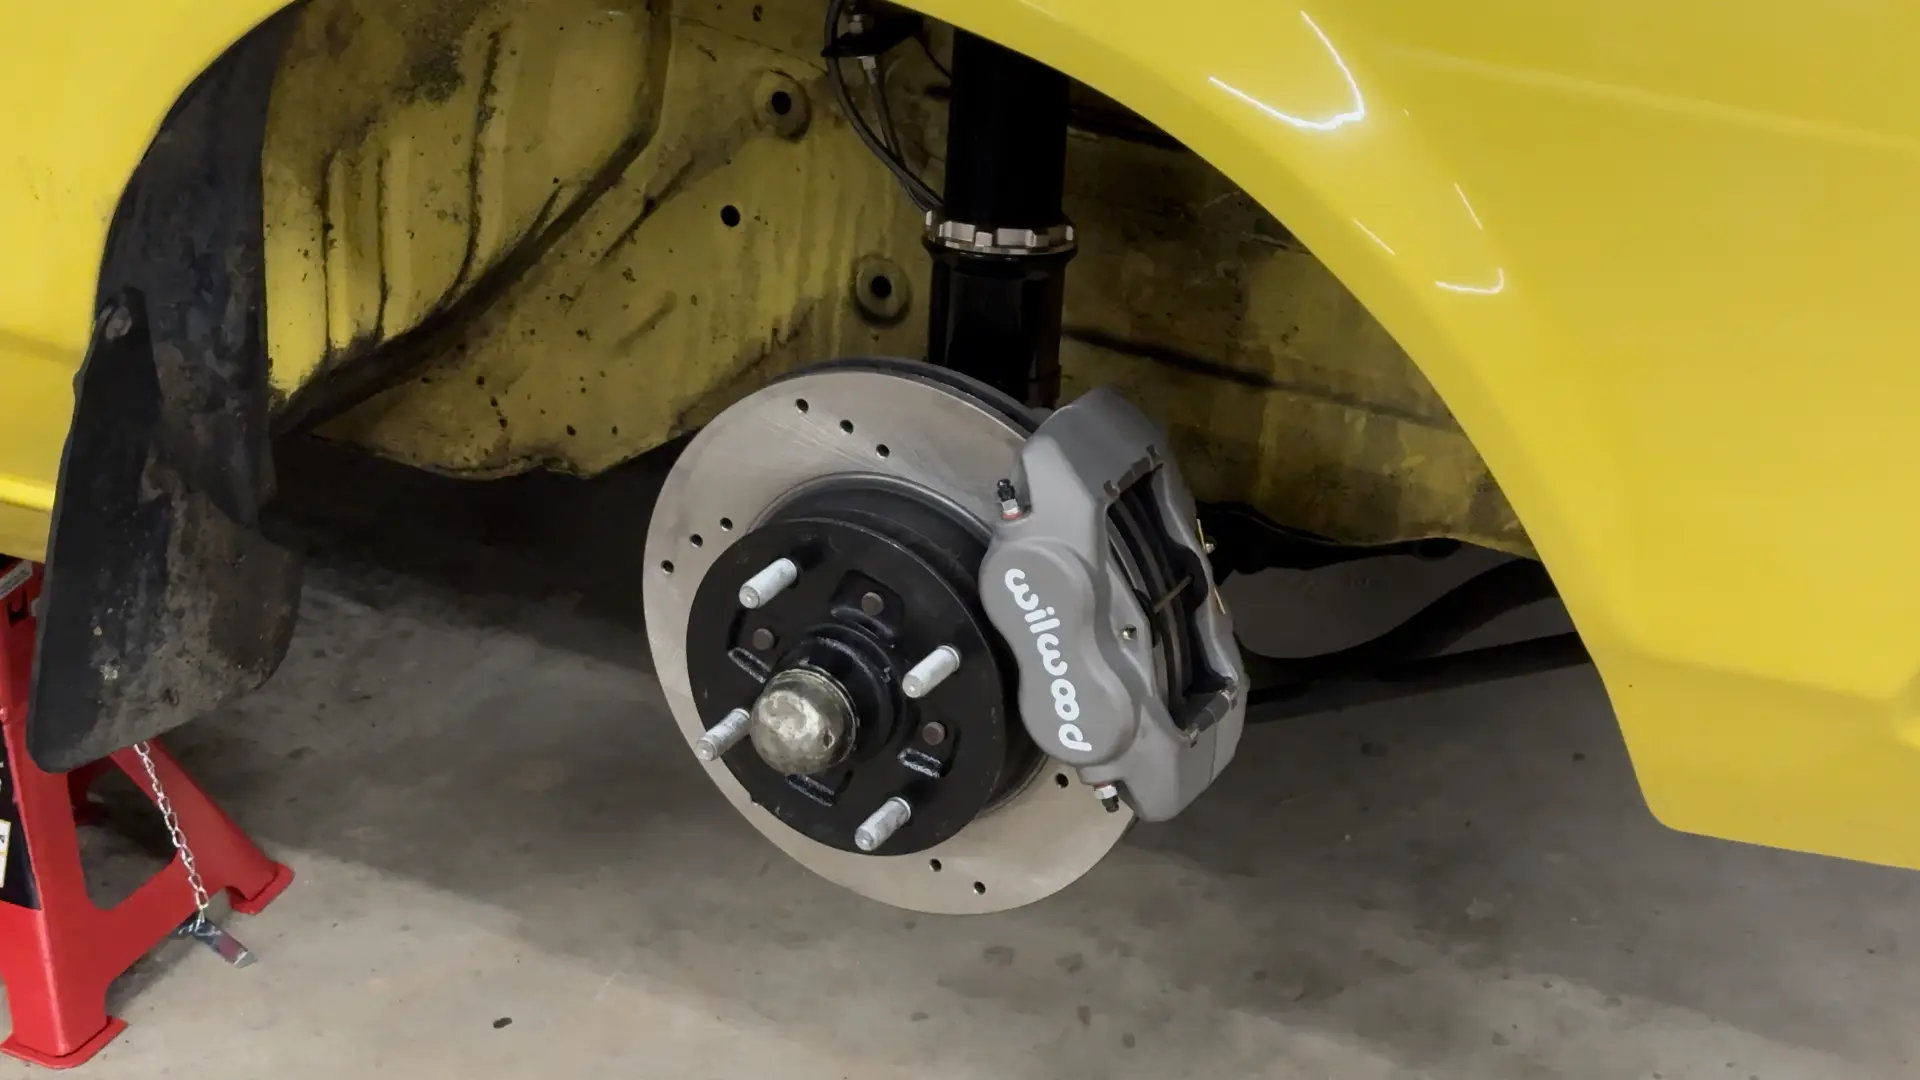
This swap is more than just a suspension upgrade; it also involves the front brakes. Since the AE86 has its spindle connected to the strut, you’ll need a few additional AE86 components to complete the swap:
I sourced the steering knuckles and wheel hubs second-hand, either from Japan or from local sellers. Once I had them, I decided to give the parts a quick refresh to make them look new. For the knuckles, this meant rust removal with a wire brush followed by painting. I did the same for the wheel hubs, but I also took the extra step of rebuilding them with a kit from Flos.ie. The rebuild process was straightforward, even for a beginner, and since I was already rebuilding, I also replaced the studs with new ones. You could opt for extra-long studs if you need them, but I just went with standard ones (also from Flo’s).
Since I was going all-in with the rebuild, I decided to upgrade the brakes as well. Here, you have a lot of flexibility. Stock AE86 brakes would generally be sufficient, but I learned quickly that even going with new stock AE86 parts would be costly. Given the expense, I figured if I was upgrading, I might as well do it properly from the start. Looking back, this level of upgrade wasn’t strictly necessary, but I love the result.
I chose a “13-inch big brake kit” from Group-D, which came with Wilwood calipers, drilled rotors, brackets, and brake lines. The kit looks fantastic and performs well, although it’s definitely overkill for a street car.
For the suspension, I opted for BC Racing BR Series coilovers with a spring rate of 6/4.5Kg/mm. So far, I’ve only tested it on the stiffest setting due to some fender scraping with my current bulky tires, but I plan to soften it once I switch tires. In my opinion, you don’t need anything stiffer than this—6/4.5Kg/mm gives the car a go-kart-like feel and incredible responsiveness. Also, remember that you’ll need roll center adjusters, with the specific size depending on the coilovers you choose.
For the rear, I went with a divorced setup, which is how the car came from the factory. However, if I could go back, I’d choose a true rear setup instead. Not only would it simplify adjusting the ride height, but it would also give you more flexibility with other components like the panhard bar and the 4-link kit. A true rear setup provides more room for adjustments, making it easier to achieve your desired setup.
That said, I installed a Group-D panhard bar and a Godspeed 4-link kit. These were both budget-friendly options with great quality. Honestly, I don’t think you’d notice a significant difference by spending more on these parts, as once they’re set up, you rarely need to adjust them. Plus, these options make the setup process relatively easy.
I covered most of the steps in detail in my video, but there’s always more to share when it comes to a swap like this. If I missed anything or if you have specific questions, feel free to reach out to me on Instagram.